Monday, December 28, 2009

A Christmas Meal

A Christmas Meal. No, not a Dickens style roasted goose, nor turkey nor ham nor seven fish dinner. In fact, this Christmas meal wasn't even eaten on Christmas Day. It was soup and salad a couple days after. Doesn't sound much like a Christmas meal? The truth is this was a meal made from and with gifts I received on Christmas.

I would like to think that I am a very easy person to shop for, and judging from what I was gifted by my family and girlfriend, it seems that I am indeed. What else do you give someone who is passionate about all things culinary??

From my girlfriend: an awesome Cuisinart immersion blender and a mandoline.


From my girlfriend's parents: flavored olive oils from a mill near their home in Arizona.


From my brother and Audrey: a himalayan salt plate and a case of wine made from interesting white varietals, including pure wines from Roussane, and Picpoul, as well as blends like a Vinho Verde (made from grapes like Loureiro/Trajadura/Pedernã) and a Cotes du Rhone from (Viognier/Marsanne/Clairette/Bourboulanc).


From my mom and Leo: a set of collapsible measuring cups (small kitchen), subscription to Cook's Illustrated and Bon Appetit, and a grembiule (pictured at left)! Also from mom and Leo, the bones from the ham on Christmas Eve and the rib roast, which made their way into a stock (the description of the meal is coming soon).


From my dad: a gift card to Macy's, which bought (among other things) this beautiful dutch oven.

From my grandma: a check so I could buy (again, among other things) the rest of the ingredients for the meal. Love you Grams!!

And thank you everyone!! I feel so blessed. May all of your gifts to me alchemize into a million more gifts to others (except maybe for the wine).

So what did I do with all of this stuff? Cook, naturally. I also had a bag of crudites leftover from Christmas Eve (I brought a Bagna Càuda appetizer plate), so we decided to make a big pot of soup in the new dutch oven. We already had a big pot of broth, so we only needed to buy a can of beans (it hadn't occurred to us to soak dry beans the night before) and some pasta. Ecco Minestrone!

I made a creamy balsamic vinaigrette with my "handy" new blender, as well as a hot sauce (made with the chili oil from Dave and Maureen) to drizzle over the soup.

I used the mandoline to julienne veggies for the salad, and enjoyed a fantastic glass of wine courtesy of the Tracy's. The 2007 E. Guigal Cotes du Rhones Blanc is fantastic, by the way.

All of it together made for a very special "Christmas meal." Who would have thought that soup and salad could mean so much, but it did. It was a beautiful night, and the love that went into this dinner must have been what made it so delicious because it really was. Grazie tante, e Buon Anno a tutti!

Saturday, December 26, 2009

Liquors & Liqueurs

The theme for this post: maceration. In the culinary world this is a term that means letting food (usually fruit) soak in a liquid to absorb and/or impart flavor (also known as soaking). Fruits are often macerated in liqueurs. In this case however, we will be macerating fruits and herbs in hard liquor. The result? Sometimes they will be sweetened, yielding a liqueur, and other times they will simply result in a flavored hard liquor. A liqueur, by the way, is an alcoholic beverage that has been flavored with fruit, herbs, nuts, spices, flowers or cream and bottled with added sugar.

I have long enjoyed drinking liqueurs, but it wasn't
until about six years ago that I was introduced to creating my own. I was working at Cafe Mare and Jean-Pierre, one of the owners of the restaurant, had just returned from Italy. J.P.'s mom apparently has an arsenal of homemade liqueurs at her home in Calabria including lemon, orange, melon, mint, and licorice. Upon returning from the toe of the boot, J.P. was inspired to serve a liqueur at the restaurant. The first liqueur that was to be made...basil--that's right, basil. Basil has a strong, pungent, sweet smell and tastes like anise. If you don't believe me, just make a basil liqueur. When we made it at the restaurant, Jean-Pierre had me bring the 'basilcello' to the table after the meal and have people guess what it was. The predominant guess was licorice.

After the basil liqueur, J.P. played around a bit (strawberry & coffee were two others) before settling back down with the classic southern Italian digestivo, limoncello. To this day he serves plenty of both types of limoncello: the standard version, and the creamy version. The allure of the creamy version is certainly strong, but really the secret couldn't be more simple. When making the simple syrup, use milk instead of water and kill the heat before it boils. I have also seen creamy canteloupe melon liqueurs in Italy that are pretty darn good. A quick word about limoncello though, before we move on. The precise origin of limoncello
is debatable, but most agree that it lies somewhere in the Italian region of Campania. Most people also agree that authentic limoncello must be made from a particular type of lemon, Limone di Sorrento, which are protected,
not unlike Champagne, under geographical indication ( IGP in Italian which stands for Indicazione Geografica Protetta).

Once I made a batch of limoncello, I realized that you could put anything in a jar of alcohol. In fact, l
iqueurs date back centuries and are historical descendants of herbal medicines, often those prepared by monks, such as Chartreuse or Bénédictine. So I started to make my own herbal remedies. At some point I bought a fabulous by book Jeanine Pollak called Healing Tonics that not only outlines how to make tonics and tinctures but also has a list of commonly used eastern and western herbs and their benefits/uses.

Since then, I make a handful of liqueurs and flavored liquors every year. They make great gifts, and they just keep getting better and better as their flavors meld and mellow over time. This season I made a spiced pear brandy, an apple/fennel-seed/cinnamon liqueur, and a pineapple guava vodka. Cocktails are enjoying a huge resurgence right now, partially driven by the ever popular "foodie" movement. Many restaurants now make their own infused alcohols, homemade mixes (like sweet and sour), homemade bitters, and fresh juices. Mixology has taken cocktails to the next level. Similar to the concept of slow food, though, the next level is more about taking a step backwards, and becoming more involved in the process. It does take some time, but if you have the passion and initiative it is worth the effort. For example, if you like Cosmopolitans, make your own orange liqueur, make a batch of cranberry infused vodka, and make your own sweet and sour mix with lemon juice and powdered sugar. I guarantee it will be far superior to any cosmo you've ordered before, unless the mixologist at the bar has done the same thing.


Above is a picture of my spiced brandy: pear, ginger, cardamom, cinnamon, vanilla, black peppercorn, clove, (unsweetened). Then again pictured below after being strained, ready to gift.


Here is a picture of the pineapple guavas macerating in vodka (I left this one unsweetened as well):


For the sweetened liqueurs, it is crucial to use Everclear or other similar strength alcohol. In California, we can only legally get our hands on 151 proof (75.5% alc./vol.). This is because once you sweeten it, you'll want to keep it in the freezer but not have it freeze.


The basic recipe is this:

-Put whatever you want to macerate in a wide mouth jar.
-Add the liquor and put the lid on.
-Give it a shake every day.
-Wait. What you macerate will determine the length of time required. Leave ginger for a month or two, lemon peels a few weeks, basil or mint for a handful of days (you get the picture?).
-Strain the macerated material with cheesecloth, and squeeze out any liquor that has been absorbed by it.
-If you are just flavoring a liquor, or don't want to sweeten it, you're done. If you want to create a liqueur or a cordial then make a simple syrup (2 parts sugar to 1 part water), and mix 1 part liquor to 3 parts syrup.
-Bottle it up and stick it in the freezer.


The possibilities are endless, so go get a bottle of Everclear, Vodka or Brandy and go nuts!! Plus, it's a good excuse to go buy some cordial glasses. Before you know it, you'll be a regular mixologist! It's good for what ails ya'
(fennel-seed/apple/cinnamon liqueur pictured above)

Wednesday, December 23, 2009

Marrons Glacés

The year is 1999. I am studying abroad in Barcelona. I had befriended a fellow exchange student and music lover named John a few months earlier. He has invited me to a concert in Grenoble, France, where his girlfriend lives. I am to meet the two of them in Grenoble, so I board a northbound train at Sants Train Station and set out for southern France on my own. I am having a conversation with a young French guy sitting across from me. He has just taken out a bag of marrons glacés, which he explains to me, are candied chestnuts. I put one in my mouth...and I have no words. I am awestruck. It is quite possibly the most delicious thing I have ever tasted.

photo by passamanerie

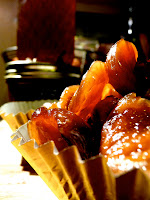
10 years later I can still taste the dense, soft, crystallized chestnut heaven that is a marron glacé, though I have not actually eaten one since that day on the train to Grenoble. It has been too long. I could order some, but they are quite pricey (like $3-4.00 per chestnut pricey). So, I shall make them myself. I have found some recipes, and they do not seem too tricky.

My first attempt...was a failure. Chestnuts, I found out, are very difficult to keep whole when you peel them. They have an outer husk and an inner pellicle that should both be removed. I have since read that some the pellicles of some varieties are easier to remove than others. I must have gotten the ones with the stubborn pellicles, because it was a pain in my ^$*%@$#!

My second attempt was...less of a failure, but still not quite a success. This time around I used prepared chestnuts that were already peeled. First I found jars of steamed chestnuts and also cans of steamed chestnuts in water, but both were still quite pricey. Then I took a peek in a grocery store in San Francisco when we were up visiting some friends and found dried chestnuts for half the price of the jarred ones. So I bought a couple of pounds, and looked up how to rehydrate them. In the end though, I realized that I hadn't rehydrated them quite enough. Nonetheless, I was left with plenty of properly candied chestnuts (mostly the less dense ones, and the broken pieces) and a great experience. I think next time I am going to spring for the the jarred ones and skip the rehydration.

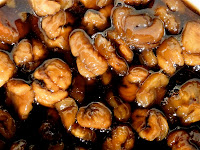
For now, though, I'll walk you through my process with the dehydrated chestnuts. First step was to boil them. I boiled them for about 30 minutes, but I think I probably should have done it for close to an hour. At any rate, once they are cooked through, drain them (reserve the delicious water and use it for making rice, or coffee, or...). Then fill a saucepan half full of water with 1/4 cup of sugar - bring to boil. Put the chestnuts in carefully, bring to a boil again, then turn the heat down so that the water just barely simmers. Cook the chestnuts until nearly tender. This takes 10 to 20 minutes.

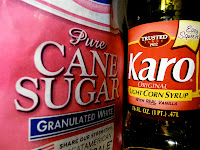
Next, make a syrup with 1 1/2 cups of the sugar, 3/4 cup of glucose (or light corn syrup) and the water; stir, and bring to a boil; cook for 10 minutes. Pour this syrup over the chestnuts, cover with a teacloth and leave overnight or all day. Drain off the syrup into a saucepan and add 1/4 cup sugar; stir, and bring to a boil - cook for 5 minutes. Pour onto the chestnuts and leave overnight or all day, again. Repeat this last procedure 4 more times, every morning and evening, adding 1 tsp. of vanilla the last two times. Leave the chestnuts in the syrup another half day, turning occasionally, then drain off the syrup, reserving it.

Now for the drying process. Preheat oven to 150"F cover an oven rack or baking rack with parchment paper (or waxed). Distribute the crystallized chestnuts evenly and allow to dry out with the oven door propped open a few centimeters for 2 hours or until they are firm. Spread the chestnuts out on a dish or rack to dry off. Pick out the small broken pieces, add to the reserved syrup and use as a garnish for desserts.

If kept more than a week or so, the sugar in the chestnuts may start to crystallize; in this case, it is better to preserve them in their syrup, draining them before use. E voilá! I can't wait until the next time I make these. You never know, I could be the next Clement Faugier!

Thursday, December 17, 2009

Golden Lentils and Crispy Matsutakes

On the menu tonight: lentils. We first considered making dal. Then I suggested French Puy lentils. When we got to the store, however, we took a gander at some of the other exciting options available. The two legumes that caught my eye were the black beluga lentils and the petite golden lentils, both from Zürson Beans. Neither of us had ever tried either one of the little legumes. We settled on the petite golden lentils, pictured below:


Let's talk a little bit 'bout lentils... Lentils need no pre-soaking and cook relatively quickly. To cook lentils, simply pick over to remove debris or shriveled lentils, rinse, and drain. Then cover with water or broth and boil for 2 to 3 minutes (to aid in digestion). Reduce heat and simmer until tender. Depending on the variety and age, cooking time may take anywhere from 10 minutes to 1 hour. Note that salt added to the cooking water will toughen the beans. You should only add salt once the lentils are completely cooked. Also, acidic ingredients such as wine or tomatoes can lengthen cooking time. You may wish to add these ingredients after the lentils have become tender. (lentil cooking tips from about.com)

These lil' lentils were fully cooked in about 10 minutes. As they were simmering, I sauteed sliced leeks, carrots and celery in a separate pan until soft. Then I added a couple of crushed garlic cloves, turned up the heat, and poured in some white wine. Finally, I sprinkled in some chopped herbs-parsley and sage-and plenty of sea salt and coarsely ground black pepper. Then stir this in to the lentils, and add more salt, pepper and/or oil to taste. To finish the dish, once I spread a portion of the lentils on the plate, I drizzled some black truffle infused olive oil over the top. I served a simple arugula salad beside the lentils, tossed in a white wine vinaigrette with diced cucumber and sliced red onions.

I had been searching for a way to cook the matsutake mushrooms that my friend Jean-Pierre gave me, and wanted to incorporate them in to tonight's meal, too. Matsutakes (aka Pine mushrooms) are prized by Japanese chefs and have a savory and pungent flavor. They have a meaty, chewy texture. The flavor of the larger matsutake mushrooms are intense, and unless the intensity is favorable to you, use sparingly. They are not Jean-Pierre's favorite mushrooms...which is one of the reasons he wanted me to play around with them, to see what I could come up with.

As chance would have it, the day he gave them to me was the day that the Top Chef season 6 finale aired. One of the ingredients in the mystery box for the final challenge was...you guessed it, matsutake mushrooms. Michael Voltaggio, who ended up winning the competition, served a dashi-glazed rockfish topped with crispy matsutake for part of his second course. This was my inspiration; thinly sliced and pan-fried until crispy.


I decided to serve the mushrooms on a separate plate, because I didn't want their flavor to overpower those in the lentils. To a hot saute pan, I added a few tablespoons of olive oil. I added in the mushrooms, lowered the heat to medium and cooked until golden brown and crispy, occasionally giving them a toss to prevent them from burning. Once done, I placed them on paper towels to remove the excess oil and tossed them in some kosher sea salt. They were great! Crispy like a thin potato chip, but packed with that pungent, musty matsutake-ness. I did end up mixing some them into the lentils and they worked beautifully. The flavors were still balanced, and the mushrooms added complexity to the texture of the dish.

Sunday, December 13, 2009

Feijoa Bread

My mom has two huge lines of shrubbery along each side of her house. Each one is about 15' tall, 35' long, and 10' thick. The hedges have thick trunks, shiny elliptical leaves, and very pretty flowers (which are delicious) that look like this:

photo by Eran Finkle - ערן פינקל's
These shrubs, or trees as they were, are commonly known as pineapple guava, or feijoa (pronounced /feɪˈʒoʊ.ə/)The latin name is Feijoa sellowiana. The genus Feijoa is monotypic, meaning it is the only type of plant within the genus. The green ellipsoid fruit, which matures in autumn has a distinctively aromatic sweet flavor. The flesh is juicy and is divided into a clear jelly-like seed pulp and a firmer, slightly gritty, opaque flesh nearer the skin. (wikipedia)

Most often feijoas are eaten raw, cutting or breaking the fruit in half and scooping the flesh out with a spoon...or as I usually do, with your teeth. But I am always looking to try something different. Years back I brought a bag of feijoas from my mom's house into the restaurant and made an infused vodka. I served up a feijoa cocktail to my friend Linda one night, who was transported back to her time in New Zealand. Large quantities of feijoas are grown in the South Pacific island country, and are commonly left to macerate in vodka. In fact, there is a drinks manufacturing company based in downtown Auckland, called 42 Below, that is renowned for its feijoa (as well as passionfruit, kiwi and honey) flavored vodka.

Apparently, it is also possible to buy Feijoa yogurt, fruit drinks, jam, ice-cream, etc. in New Zealand, and is also a popular ingredient in chutney. My mom once made a wonderful feijoa sorbet. She served it, as is often done in Italy, as a palate cleanser between courses. Recently I tried to make a feijoa custard, but it didn't come out just right. I decided that next time I would make a vanilla custard and make a feijoa sauce to spoon over it.

At any rate, I came home from my mom's the other day with another huge bag of feijoas, and wanted to make something new. I scooped out all of the flesh and made a puree, still not quite sure what I was going to do with it. I woke up Saturday morning, and it hit me: feijoa bread. I had a bag of gluten-free flour in the pantry, and so decided to make my bread sans gluten. It turned out to be a delicious cake, but it did become quite dry over the next couple days, so I would suggest eating in one sitting. ;^) Next time I think I'll add another egg, or just go for wheat flour.

Ingredients:

2 cups gluten-free flour blend
1 1/2 tsp. baking powder
1/2 tsp. baking soda
1/4 tsp. salt
1/2 tsp. vanilla
2 eggs, beaten
1 1/2 cups feijoa pureé
1 cup sugar
1/2 cup melted butter

Directions:

Preheat oven to 350F. Grease medium bread pan with butter and reserve. Combine dry ingredients in a large bowl and then make a well in the center. Add eggs, feijoa, sugar, and butter (cooled so to not cook the egg) to the center and combine them before folding into the rest of the dry ingredients. Pour or spoon batter into your bread pan. Bake for an hour or until a toothpick comes out clean, and Bob's your uncle! Cool for a few minutes before removing from pan, and then cool on a wire rack. Devour.


We will have to see what new culinary adventure my next feijoa encounter brings...I won't be surprised if I end up making feijoa bread again. And again.

Oh, by the way, don't be afraid to spread some extra butter on your warm slices. Wrap your laughing gear around that!


p.s. If you're patient enough to try your hand at making feijoa wine, check out Jack Keller's site.

Friday, December 11, 2009

Something Simple

We had just finished the leftover sausage pizza as an afternoon snack when I started thinking about what to cook for dinner. "I can't even think about eating something else right now," said Lissa. After we awoke from our ritual cat nap, she could start thinking about food, although the meal was requested to be something light...something simple. We started to brainstorm, and with the rain falling outside on a cool December night, I decided that I would prefer a pile of sauteed vegetables to a pile of salad.

Before I went to the store, I dropped by Cafe Mare to loan Jean-Pierre my Flavor Bible in hopes of spurring some combination inspiration (especially with a certain Tricholoma magnivelare). Then it was off to Shopper's Corner to get some (beautiful) fresh fillets of Petrale Sole. I also bought some swiss chard, and one lovely yellow brandywine tomato (I love California...organic, locally grown non-mealy heirloom tomatoes in December).

The culinary illumination for this meal comes from Italia. Italian cuisine lends itself to simplicity. If I learned nothing else about Italian food from working at Cafe Mare for six years it is this: use the best possible ingredients, and let them shine by keeping things simple. That was my plan for this night, and it worked out splendidly.

First thing was to prep my chard. I actually like to use the stems (though tough, that's usually where you'll find lots of fiber and nutrients in veggies) as well as the leaves. I cut the stems out and then slice them thinly. They will get sauteed in olive oil with some minced garlic for a couple of minutes, so to soften up before I add the sliced leaves and lemon juice. The leaves cook very quickly, so I will make sure to have everything I need on hand, as well as have everything else plated or ready to plate before I toss them in the pan.

Next I get my sauce for the fish going. I slice a quarter of a red onion, dice my fabulous tomato, pit a small handful of kalamata olives, and drain a couple tablespoons of capers. Now the assembly...a drizzle of olive oil meets a preheated pan (medium high), and onions jump in and soften until translucent. Then the tomatoes, olives and capers join in and the fire calms. A sprinkle of salt finds its way to the sauce, and before you know it, your simple sauce is a success.


Now the sole. It doesn't get much more simple than sole. Salt and pepper, lightly pan fry in a hot pan with olive oil, about 1 minute on each side. Be careful when you flip it that the sole does not fall apart (no one wants a broken sole), it's quite a delicate fish. That's it! Plate the sole, spoon the sauce over the top. If you haven't already tossed the chard leaves in the pan, do so, then sprinkle in some lemon juice and salt, toss a couple times, then plate alongside the sole. I chopped some fresh chives as a zingy garnish, and...finito. E guardate che bello...